Showing posts with label Lab. Show all posts

Saturday, January 12, 2019

My New Favorite ISE Setting

 on  with No comments 
In ,  
And by favorite, of course I mean least favorite ever.

This one has been a thorn in my side for a while now. In the User Password Policy (Administration > Identity Management > Settings > User Password Policy), under Password Lifetime, there's a setting called "Disable user account after ____ days if password not changed." This setting is enabled by default, with a value of 60 days.

What happened is that I set up a pretty weak password policy for convenience including passwords that do not expire (it's a lab environment, and I only have the one local user account in ISE) but seemingly out of the blue, the account would become disabled. At one point, I even deleted the account and created a new one. Who notices it's been exactly 60 days? I'd reenable the account, and the next day it would be disabled again. The only thing I use this ISE local account for is the automated testing feature on my 802.1x enabled switches. This account becoming disabled leads to a long list of nasty red failed authentications in the Live Log.

For reference, here is the setting:


Share:

Saturday, December 29, 2018

802.1x in GNS3

 on  with No comments 
In , ,  
After tiring of the trips up and down the stairs dealing with a physical 3750 switch and Windows 7 workstation testing 802.1x, I decided to give it a shot virtually. And I'm pleased to report that it works like a champ.  This post is not a how to guide on setting up 802.1x, it's to show another complex configuration topic that can be done exclusively in the virtual domain.  And while I've never done it personally, I've seen elsewhere that it's also possible to do in EVE-ng.


I setup a basic topology in GNS3. In the light blue oval is the connection to the physical network.  The cloud connects to VLAN10 on my physical 3750 switch, which is the home network. There's a generic GNS3 switch there just in case I want to tie anything in at that point in the future, but at this point it's unnecessary and not really being utilized. Next we have BB2, which is a IOU router (i86bi-linux-l3-adventerprisek9-15.4.1T.bin if you care) that provides a degree of separation between the "real network" and the test area. SW11 is a L2 IOU image (i86bi-linux-l2-adventerprisek9-15.2d.bin) playing the role of the supplicant in the chain.  And finally we have fn-ws70008, which is a domain connected Windows 7 workstation which runs in qemu on the GNS3 VM.  The Yellow section branches out into another area of the topology that isn't relevant to this discussion.

Be advised that using a nested VM like this (qemu VM running inside of the GNS3 VM) is horrible from a performance standpoint. However the performance is not bad enough that delays lead to timeouts, so I can live with it for now.

At this time, I'm using the Windows 7 VM to confirm both 802.1x and MAB operation. I had a basic VPCS host that I tried to use for MAB, but for whatever reason, the switch didn't want to play nice with that host so I just set it to try both but prefer 802.1x on the Windows 7 workstation so I could see both play out in the ISE logs. If you can get a MAB authentication to trigger with a VPCS host or a router, I'd love to hear about it.

Turning our attention over to ISE, the next 2 images show the basic NAD configuration for SW11. Nothing out of the ordinary here, straight out of the documentation.


The switch configuration comes straight from the SISAS certification guide in Chapter 12.  You can also find a great stand alone PDF right here from Cisco.  As far as I recall, everything in the cert guide and the PDF work in this version of the L2 IOU image except for LLDP device tracking (Edit: its working now with no changes on my part.  No idea why it didn't before). CDP and DHCP tracking work, so that's definitely not the end of the world.  One caveat to keep in mind is that ip routing is enable by default on these switches which led to a short session of head scratching when I couldn't reach anything off of the local network from the switch the first time I started seriously labbing with it.

From what I can tell, the L2 IOUv works great as well, however I haven't labbed to seriously with it yet since the L2 IOU image does everything I've asked of it and I've been using it since before IOUv was a thing. As another note, there is a significant syntax difference with IOU 15.6 so I'm holding off on that one as well.

Configuring ISE for 802.1x is also straight from the SISAS certification guide, so no need to beat a dead horse rehashing it here.  Chapters 10 and 11 cover AuthZ and AuthC policy creation.  So with all that completed, let's check the Live Log in ISE. For the record, I'm running ISE 2.0 with no patches applied.

Here we'll see the workstation performing MAB and 802.1x authentication successfully. You'll also note the switch doing the automate-tester authentication with the local-bob account. For ease of use, I have an AD account called domain-bob, a local account on ISE called local-bob, and each router has a username called router-bob. Thanks to Keith Barker inspiring me to name all the users Bob, though I at least saw the potential for confusion with both the domain user and ISE user being just "bob."

And as one last show of compatibility, I've configured sw11 to send syslog to my local Splunk server. I do use the ISE interface for debugging as much as possible while labbing, as you should when you're trying to learn everything about ISE, having one location for long term log retention for troubleshooting purposes is very valuable when the problem involves multiple devices, and/or you want to look back at the messages for a similar situation that did work.


BB2 is also configured with ip-helper to forward DNS requests to one of my Windows domain controllers, both of which exist outside of this GNS3 topology. That also works flawlessly. 

So bottom line is that I'm really liking these IOU images (both L2 and L3) and they're almost fully meeting my labbing needs.  Since more recent ISE versions appear to work in GNS3 as well, you could theoretically work through the SISAS almost completely in GNS3 at this point. Connecting the dots in the exam topics tell me I still want to know ACS, though I cannot say for sure. It's not specifically listed on the topics and I haven't taken the exam yet. But the exam is written for ISE 1.2 (which doesn't have TACACS+ support) and the topics do say implement device administration with both TACACS+ and RADIUS.

Next up, 802.1s on NX-OS using the Cisco Nexus 1000V switch image, though I'm not sure when I'll get around to that. Nexus switches do not appear anywhere in the security track (yet) but I do want some exposure to them. Maybe I can integrate a 1000V image into ESXi and ditch the nested Windows 7 VM.
Share:

Saturday, December 22, 2018

Troubleshooting With Near Zero Access

 on  with No comments 
In , ,  
Early one morning last week I attempted to RDP into my lab to test something out I was looking into at work. Access to my terminal server was fine, but from there, I was unable to access any other system on my network. Every system that I attempted to RDP into came back stating that my user account was unauthorized for RDP access on that system. The user is a Domain Admin so there should be no reason for that. Not too long after, I noticed that the terminal server was asking for a username and password for everything with is out of character for my user account. And after accounting, I get access denied errors for anything requiring elevated privileges. My first thought was that my network was compromised.

Share:

Wednesday, May 3, 2017

Moving to IPv6 in the Lab

 on  with No comments 
In ,  
IPv6 is one of those technologies that I've been wanting to dig into further.  I know enough that I can get through the certification exam of the day with a little book time to refresh, but I don't know it well enough.  It's not something I've been avoiding, just something that I've kept putting off because something was more pressing, more interesting, or potentially more useful.  So there's no time like the present. Let's get started.

I began by reconfiguring the network to better align with all the blog posts and docs that I've read to date.  I originally had the 3750 doing the intraVLAN routing, but I decided to simplify and push everything out to the 2821 at the edge for now.  So the 2821 and 3750 are doing router on a stick.  There are 2 VLANs I'll be using (10 and 20 for now, additional VLANs are there but not IPv6 enabled yet), so the /60 Comcast is currently handing out that can be broken down into 16 /64's will suffice.  I think a lot of areas are getting more than a /60, but it's more than enough for now.

On the 2821, we'll start by enabling ipv6 routing.  Naturally, the commands are a bit different here and there.

ipv6 unicast-routing
ipv6 cef

Then on the outside interface, we'll pull our /60.  If your ISP is handing out bigger chunks, adjust your hint accordingly.

interface GigabitEthernet0/1
 ipv6 enable
 ipv6 address autoconfig default
 ipv6 dhcp client pd hint ::/60
 ipv6 dhcp client pd COMCAST

First we enable ipv6 on the interface and then pull a /60 and put it into a pool called COMCAST.  In a lot of other docs online, I see the addition of "ipv6 address dhcp" added on the outside interface as well.  But my router/IOS combination wouldn't take that command and it's working fine without it, so keep this in the back of your mind.

Next, we'll go onto the inside interfaces.  We'll set up the IPv6 addresses and have a little ROAS review here too.

interface GigabitEthernet0/0
 no ip address
interface GigabitEthernet0/0.10
 encapsulation dot1Q 10
 ipv6 address COMCAST ::1/64
 ipv6 dhcp server COMCASTPOOL
interface GigabitEthernet0/0.20
 encapsulation dot1Q 20
 ipv6 address COMCAST ::2:0:0:0:1/64
 ipv6 dhcp server COMCASTPOOL

What we've done here is put the first /64 from the COMCAST pool onto VLAN 10, and the second /64 onto VLAN 20.  The next line on the interface sets up the dhcp options for the two VLANS.  The only options that I've currently configured are the DNS servers.  I'm actually using my own Domain Controllers (which is what you should use if you have them), but for here I'll put in Google's.  There's some timers that may need tweaked in regards to neighbor discovery, but that's a little beyond my understanding at this point.  I'll get into that at a later date.

ipv6 dhcp pool COMCASTPOOL
 dns-server 2001:4860:4860::8888
 dns-server 2001:4860:4860::8844

So now we have full IPv6 connectivity on just about everything in the lab (for some reason, none of my Virtualbox guests can ping past their own Ethernet NIC, but that's a topic for another day).  I've disabled IPv4 completely on a test machine (Server 2008 Enterprise) and loaded up Yahoo.


So far so good.  We've got connectivity.  The NIC settings are shown to demonstrate that IPv4 is indeed disabled.

What's next?  I would like to move intraVLAN routing back down to the 3750 and have a single routed link between it and the 2821. Then I want to move the DHCPv6 functionality for each VLAN down to the domain controllers so I can manage all the IPv6 bits with Windows IPAM as I do now with the IPv4 bits.  And finally, I need to update the IOS on my 3750 to an image that supports IPv6, among other shortcomings I'm currently hampered by.

But first things first, I'm going to move my Hyper-V servers from Server 2012r2 to 2016 and finally get them into a failover cluster.  Between that and getting some shared storage together for the cluster should get me through a good section of the MCSA 2016 topics.
Share:

Saturday, January 28, 2017

Power On virtual machine stuck at 35%

 on  with No comments 
In ,  
Here's  just a quick little blurb about a problem I ran into this morning.  The cables for my SAS controller FINALLY arrived yesterday, so I installed them last night.  With the additional storage now available, I moved a couple VMs over to give the existing datastore some breathing room.

It's not a very intuitive process, you have to browse the datastore, right click on the folder containing the VMs files, and select move.  From there, you'd think ESXi would be smart enough to figure it all out, but you'd be wrong.  I had to remove the VM from inventory, then add it back in from it's new location.  But that's not the end of the fun, both of the ones I moved got stuck at 35% when powering them back on.

So here's what happened because you may not see the problem right away.  When I clicked on the summary for the VM (Not the default tab when you go to the VM in the vSphere client), you'll see a bright yellow box asking if you moved the VM or if you copied it because it knows you've done one or the other.  I selected "I Moved It," and then the VM's finished starting up without any further delay.

Share:

Wednesday, March 23, 2016

Building the Issuing CA

 on  with No comments 
In , ,  
In the last post, we went through building the root CA which followed building the domain and generating a mess of test users.  Moving along this time, we're going to start building the issuing CA for the domain and for our network devices.  Once we get through this stage, the root CA can be powered down, and moved to long term permanent storage if necessary.

Once again, I'll be using the The 70-640 Self-Paced Training Kit from Microsoft Press as my guide, though the MCTS 70-640 Cert Guide from Pearson will work as well.  I actually prefer the Pearson book as it feels more in depth and complete than the Microsoft Press book.

First, ensure that the root CA and issuing CA are both running. Log into the issuing CA with an administrator account.  As with the root CA, you can use a local administrator on the issuing CA, but a domain administrator will be fine as well.  And unlike the root CA, if you are using Server 2008 or 2008R2 for the issuing CA, it needs to be Enterprise or Data Center Edition.  For Server 2012 and up, Standard Edition will be sufficient.

I'm really liking the decision now to go with Server 2008R2 for the root CA ,Server 2012R2 for the issuing CA, and Server 2016 for the domain controller.  The contrasting appearances of windows in the three operating systems really helps to make it clear which server is which in the screen shots.

Enough of the small talk, let's get started.  Launch Server Manager if it is not already running.  As with setting up the domain controller, start by selecting add roles and features.


Select the local server from the list if it is not the only one, just proceed if it is.


Select Certificate Authority from the list, and accept the prerequisite roles and features to be added.


There won't be any additional features to add, so just Next your way through.


Now options for the CA role appear.


Here we'll select Certificate Authority and Online Responder.  We'll be adding NDES later. With 2008 and 2008R2, you couldn't install NDES at the same time as any other CA role.  I don't recall if that is true still for 2012R2, but I'll just go with what I know here.


We'll have the options to configure IIS next.


The necessary IIS bits will be preselected, add any thing else you may want.


We're now at the confirmation screen where you get one last chance to go back.  Hit install whenever you're ready.


Everything selected will install.


Once the installation is complete, you'll find yourself back at Server Manager.  If you click on AD CS on the left, you'll notice that additional configuration for the AD CS role is required.  On the yellow bar, first click More, then configure.


Here is a dialog box giving you information about what needs to be done.  Click Configure again.


First, you will need to provide credentials. Give the currently logged in user, or provide a username/password for a different user.


Select both Certification Authority and Online Responder to configure.


Select Enterprise CA.  If you don't have the right edition of Windows Server, this option will be grayed out.


Next, select subordinate CA.


Create a new key.

Select your cryptography options.  I went with all the same options as before.  You can lower the strength if resources are at a premium.


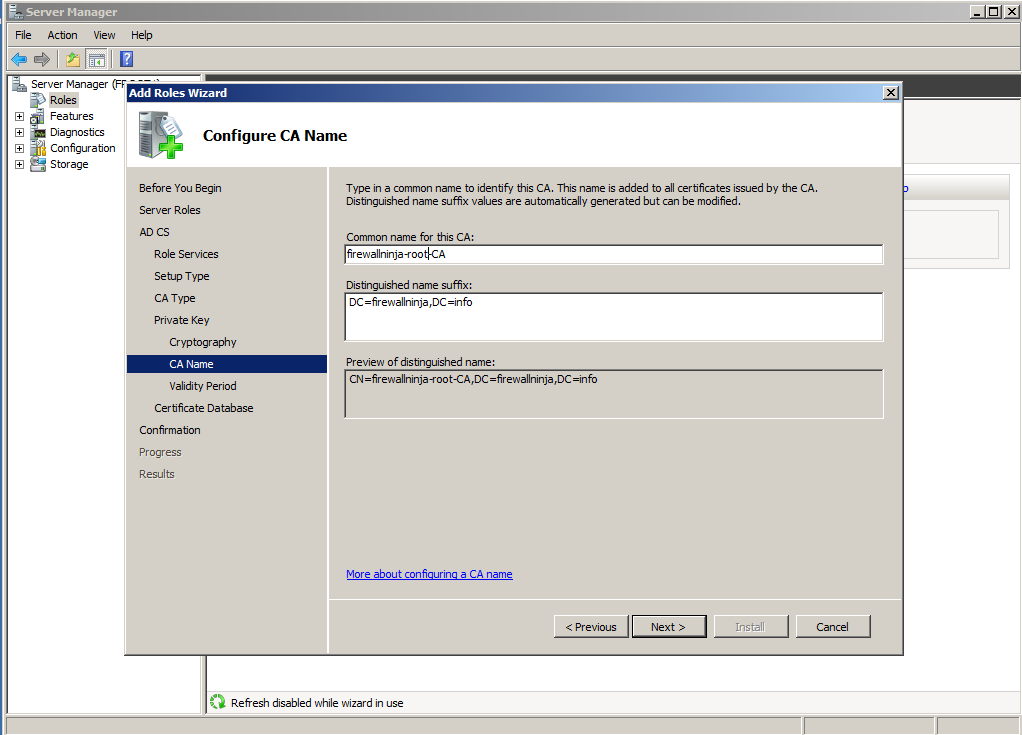
 Here we'll name the CA.  Again, this is not the same as the server's hostname.  The defaults are fine.


Here we'll specify that we want to get a certificate from our root CA.  Click the radio button next to Send a certificate request to a parent CA, and then hit the Select button and choose the root CA.


Here's where the data files will live for the CA. The defaults are fine for a lab server.


Confirmation of your settings.


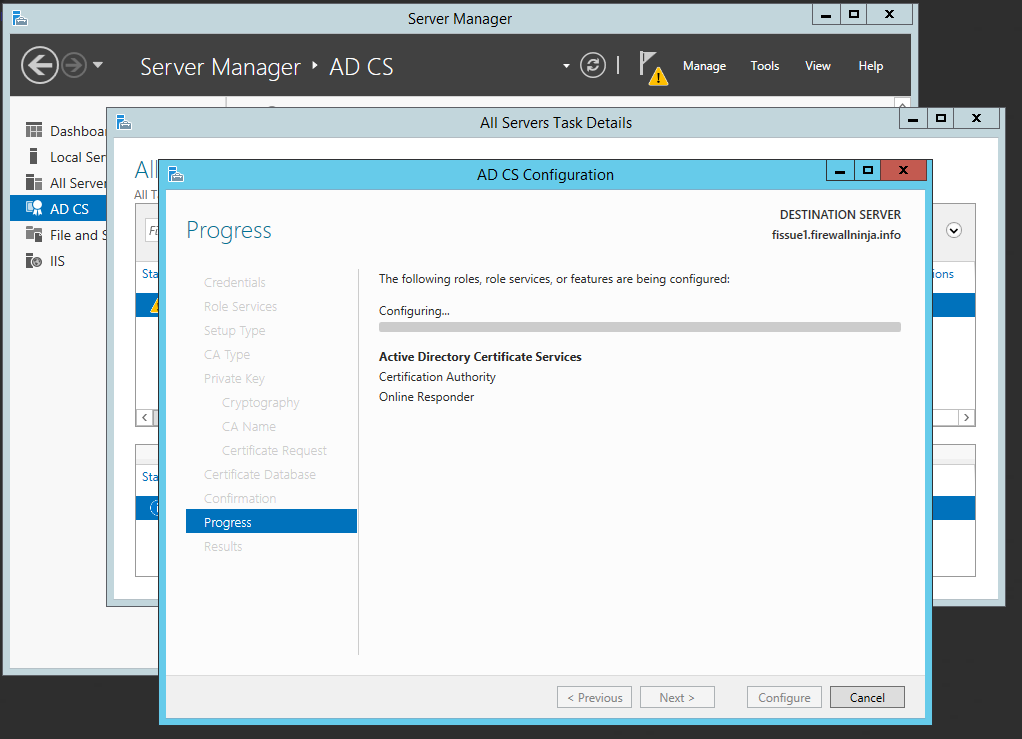
 Finish up the wizard and allow the configuration to take place.


Now, create a file share somewhere on the issue CA.  You'll be copying your cert to this share from the root CA later.  If you need a refresh on creating a share, Technet has you covered.

Finally when it is done configuring, you're ready to bring the issuing CA online.  Go back to the root CA and load the Certification Authority mmc.  In the Pending Requests folder, you'll see the request from the issuing CA.  Right click on this request and select issue.


Now you'll see that the cert has moved from Pending Requests to Issued Certificates.


Right click on it again and export the cert.  Once you have it on the HDD, move it to the file share on the issuing CA. For some reason on mine, it saved with a long random name with .tmp as the extension, but it worked.


Back at the issuing CA, right click on the server name and select All tasks, Import.  If you got a .tmp file as well, you'll have to change file type to All Files in the open dialog box.

You'll notice that there really isn't much difference in the layout and functionality of the CA mmc on the two different operating systems.  When you really dig in, there will be additional features in 2012R2, but other than that it's minimal and cosmetic.


With the certificate installed, you'll finally be able to start up the Certification Authority service.  From the CA mmc, right click on the server and select All tasks, start service.


Now that your issuing CA is up and running, wait through another group policy update cycle (roughly 90 minutes) and then you can shut down your root CA.  

Note that the issuing CA will not appear in the Certification Authorities container in Active directory as the root CA did.  Instead, check the Enrollment Services Container, which contains all CAs for Active Directory, not just the root CA.  For the purpose of this post, verification of the issuing CA is enough, but if you care to know more about the matter, you can find some great information on Technet.  I'll certainly cover more in depth information like this as my work in the lab gets to it.


The last step here is to install and configure the NDES service on the issuing CA, but this post is long enough so I'll save that for another post. 

Share:

Saturday, March 19, 2016

Building the Root CA

 on  with No comments 
In , , ,  
In the lab, a single Windows Server running Active Directory and Active Directory Certificate Services.  But if you haven't figured out yet, I am a big fan of overkill and never do anything only to the level of minimum required.  I always like to do everything bigger and better, as there will be additional opportunities to learn that way.  I'm using The 70-640 Self-Paced Training Kit as a guide, one of the two books that I used years ago when I was studying for the MCSA 2008.  I actually liked the Pearson book by Don Poulton better, but the Microsoft Press book is sufficient, even if it is a bit thin in the details.

In a previous post, I created a domain with the name firewallninja.info on a server with Windows Server 2016 Technical Preview 4.  Today we'll continue building out the security lab by adding the first of a 2 tier CA hierarchy, the root CA.  I have previously built a VM with Server 2008R2, configured its hostname and IPv4 settings, and added it to the firewallninja.info domain.  If you need a refresher on adding a new server to your domain, here is a guide for Server 2003 and 2008 and here is a guide for Server 2012R2.  For the root CA, Windows Server 2008R2 Standard, Enterprise or Datacenter Edition can be used.

I selected to go with Server 2008R2 rather than going 2012R2 for both CAs for a couple of reasons.   First, when I had an MSDN account though school years back, I build a large volume of Server 2008R2 VMs and haven't used even a fraction of them yet.  And I probably won't, seeing as most of the labbing I do is on Server 2012R2 at this point.  This is a root CA that is going to be powered down and I'll probably never see it again, so why not.  Second, there are a few slight differences when working with 2008R2 and 2012R2, so I wanted to run through it on both for the sake of exposure.  Server 2008R2 is still out there, probably still in higher numbers than 2012R2 at this point.  I don't recall the root CA requiring any specific version of Windows Server to use the latest/greatest features on the issuing CA, so Server 2000 or 2003, or even Linux with OpenSSL may be sufficient as well.

So let's get started on the root CA.  Log into the server with an administrator account.  A local admin account is sufficient, but you can use a domain admin account as well.  Let the Server Manager load as that's the tool we'll be using.


On the left pane of Server Manager, find Roles and click on it.  On my server, nothing has been installed yet, so the box is blank and says 0 of 17.   Click on Add roles on the right.


Next, select Active Directory Certificate Services.  If you want to add any other server roles, you can select them as well.


Once you have selected Active Directory Certificate Services, you'll see the box change to include options for the role, or roles, that you have selected.


For this server, I'm only going to install Certificate Authority.  The others will be used on the issuing CA later.


Next, I'm going to select Standalone.  The difference is beyond the scope of this post, but you can read more about this at Technet, if you're interested.


Here I'm going to select Root CA.


Next, I'm going to have the server create a new private key.  Since this is a new setup, I don't have an existing key to give it.  If you were replacing a server that died and are fortunate enough to have the private key from that server, you can import it here.  Another reason why you would import a certificate here would be if you purchased one from a 3rd party CA such as GoDaddy.


I'm going to keep the default 2048 bit key, and I'm going to use SHA256.  Modern web browsers are either flat out dropping support for SHA1, or making it difficult to enable, so you should be thinking about that when configuring cryptography in your CAs.  The last option on the page, "Allow administrator interaction when the private key is accessed by the CA" is an additional security control that requires an admin user to interact with the CA.


Next, we'll choose the distinguished name for this CA.  This is not the same as the server's hostname, but can be.


I'm changing the lifetime of the certificate to 20 years.  This is a lab, and I don't want to have to worry about my cert expiring and then finding that the root CA that's been offline for 5 years doesn't want to boot up.  With any luck, I won't still be using this domain in 20 years.


Give the location on the filesystem for the CA data.  Like the AD data, the defaults are fine in the lab, but you'll want to spread the love around multiple spindles if possible in production.


Review your choices here, or don't, and then click Install.


Go grab a cup of coffee and/or a snack. This takes a few minutes, especially in a VM.


Finally, everything is installed and we're ready to go.


Back at the Server Manager, you can view the results of the installation.  For instance, in the events, you should see event 103 which indicates that your CA name has been added to the Certificate Authorities container in Active Directory.

After the next group policy cycle, you can move on to the issuing CA.  Now if we go back to the domain controller and dig down in ADSIEdit, we can see the root CA in the Active Directory schema.  The root CA can go offline once the issuing CA has its cert.


With the root server in AD and powered down, we will only ever need it again at such time that we need to generate a new root certificate.  Next up, the issuing CA.
Share: