Wednesday, March 30, 2016

Installing NDES on the Issuing CA

 on  with No comments 
In , ,  
The Network Device Enrollment Service (better known as NDES) is a component of Active Directory Certificate Services.  It's based on the industry standard Simple Certificate Enrollment Protocol (SCEP) which is an Internet Draft by the Internet Engineering Task Force (IETF).  SCEP is designed to make digital certificate issuance as simple and scaleable as possible.  SCEP can be used to distribute certificates to network devices such as routers and firewalls, as well as mobile devices such as cellphones.

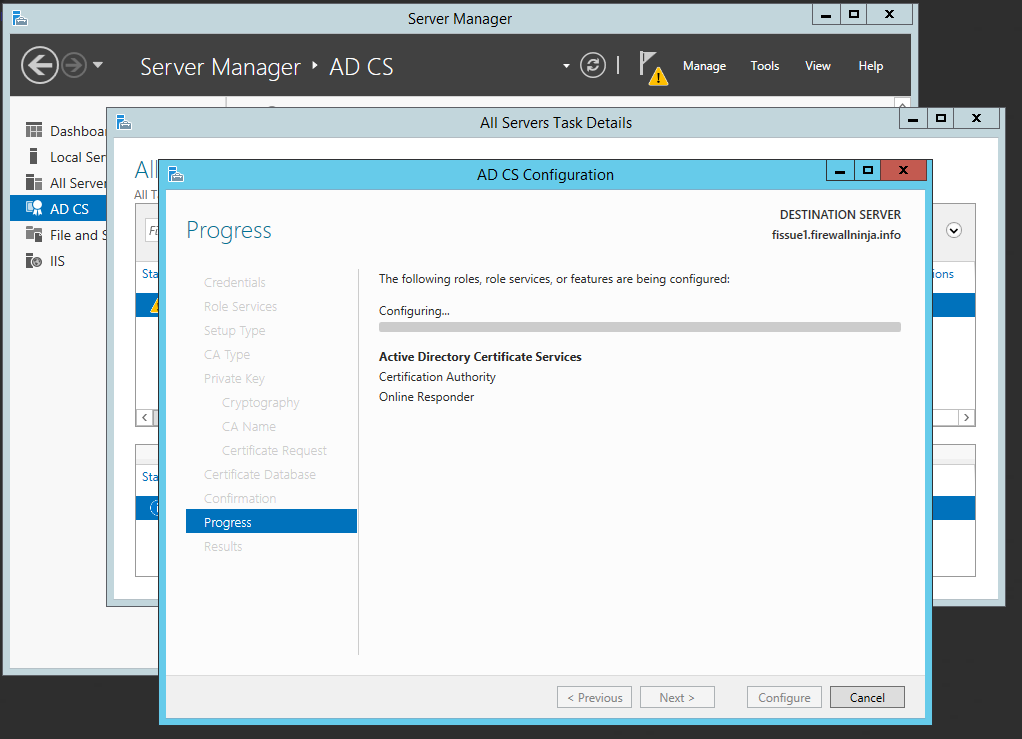
In this post, we'll go through the installation of NDES on the issuing CA.  There won't be many screenshots this time around since we've already seen pretty much everything installing the Active Directory Certificate Services role on both CAs. Note that I'll be using the domain name of firewallninja.info throughout.  Substitute the name of your domain as appropriate.

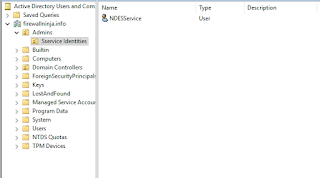
First, we need to add a service account.  On the domain controller, launch Active Directory Users and Computers (ADUC) from the Administrative Tools program group.  On the left side of the screen, you'll see the OU hierarchy for your domain. Right click on firewallnina.info and create a new OU called Admins.  Inside the Admins OU, create another OU called Service Identities.  Right Click on Service Identities and select new and then user.  Give this user the username of NDESService and a firstname of whatever (you have to give the user either a first name or last name in addition to a username), and on the next screen a password that you'll be able to remember. Uncheck User Must Change Password at Next Login and select Password Never Expires. Finish off the wizard to create the user. It will look as follows when you are done.


Now go back to the issuing CA.  Launch Computer Management from the Administrative Tools program group.  Expand out Local Users and Groups, and then Groups on the left side.  Double Click IIS_IUSRS, and then click Add.  In the search box that comes up, enter NDESService, and press OK.  Press OK on the IIS_IUSRS properties, And then close Computer Management.

Now in Server Manager, Select Add Roles and Features. 
  • Hit Next a couple times until you get to the Server Roles screen.  
  • Expand out Active Directory Certificate Services and check the box next to Network Device Enrollment Service. 
  • OK additional pieces of IIS to install.  
  • On the Specify User Account page, click Select User and enter the NDESService user and its password. 
  • On the Specify Registration Authority Information page, give a name for the NDES service (different than that given for the issuing CA) and select a country from the drop down list.  The rest can be left blank.  
  • On the Configure Cryptography screen, choose the settings that you used for the Root CA and Issuing CA.
  • Review the information about IIS and hit next.
  • Review the Confirm Installation Services page and hit next.
  • Install NDES.
NDES has now been installed on the issuing CA and is ready to use.  We've now completed the setup of the issuing CA.


Share:

Saturday, March 26, 2016

Backup Your Blog on Blogger

 on  with No comments 
In ,  
Here's a little quick and dirty post on backing up your blog on Blogger since every howto that I have seen online is a bit dated and things have moved.   But that's to be expected, things are always moving when it comes to Google.  Like all things in IT, you should make a regular backup of your blog just in case you have an oopsie, or Google determines you have violated their terms and shuts you down.

In your Blogger control panel, go into the settings for the blog you want to back up.  On the left side of the page, you'll see Settings at the bottom of the list of categories.  Click on Settings, then at the bottom of the Settings submenu, you'll see Other.  Click on Other, and at the top of the page you'll see "Import & back up."  Click the button labeled "Back up Content," and you'll be presented a save as dialog box which will let you save a single .xml file with all of your blog's settings and posts.  If you examine the outputted .xml file, you'll find everything there.  Should you wish to move your site do a different platform in the future, many platforms will be able to import this .xml file directly.
Share:

Wednesday, March 23, 2016

Research Results

 on  with No comments 
In , ,  
Our survey was posted online for a period of one week. Following this period, data was pulled down from SurveyMonkey in the form of a Microsoft Excel spreadsheet. Survey results were converted from text to numeric answers. All statistical analysis was conducted in IBM SPSS v23 for Linux on the OpenSUSE Leap 42.1 operating system.

Share:

Building the Issuing CA

 on  with No comments 
In , ,  
In the last post, we went through building the root CA which followed building the domain and generating a mess of test users.  Moving along this time, we're going to start building the issuing CA for the domain and for our network devices.  Once we get through this stage, the root CA can be powered down, and moved to long term permanent storage if necessary.

Once again, I'll be using the The 70-640 Self-Paced Training Kit from Microsoft Press as my guide, though the MCTS 70-640 Cert Guide from Pearson will work as well.  I actually prefer the Pearson book as it feels more in depth and complete than the Microsoft Press book.

First, ensure that the root CA and issuing CA are both running. Log into the issuing CA with an administrator account.  As with the root CA, you can use a local administrator on the issuing CA, but a domain administrator will be fine as well.  And unlike the root CA, if you are using Server 2008 or 2008R2 for the issuing CA, it needs to be Enterprise or Data Center Edition.  For Server 2012 and up, Standard Edition will be sufficient.

I'm really liking the decision now to go with Server 2008R2 for the root CA ,Server 2012R2 for the issuing CA, and Server 2016 for the domain controller.  The contrasting appearances of windows in the three operating systems really helps to make it clear which server is which in the screen shots.

Enough of the small talk, let's get started.  Launch Server Manager if it is not already running.  As with setting up the domain controller, start by selecting add roles and features.


Select the local server from the list if it is not the only one, just proceed if it is.


Select Certificate Authority from the list, and accept the prerequisite roles and features to be added.


There won't be any additional features to add, so just Next your way through.


Now options for the CA role appear.


Here we'll select Certificate Authority and Online Responder.  We'll be adding NDES later. With 2008 and 2008R2, you couldn't install NDES at the same time as any other CA role.  I don't recall if that is true still for 2012R2, but I'll just go with what I know here.


We'll have the options to configure IIS next.


The necessary IIS bits will be preselected, add any thing else you may want.


We're now at the confirmation screen where you get one last chance to go back.  Hit install whenever you're ready.


Everything selected will install.


Once the installation is complete, you'll find yourself back at Server Manager.  If you click on AD CS on the left, you'll notice that additional configuration for the AD CS role is required.  On the yellow bar, first click More, then configure.


Here is a dialog box giving you information about what needs to be done.  Click Configure again.


First, you will need to provide credentials. Give the currently logged in user, or provide a username/password for a different user.


Select both Certification Authority and Online Responder to configure.


Select Enterprise CA.  If you don't have the right edition of Windows Server, this option will be grayed out.


Next, select subordinate CA.


Create a new key.

Select your cryptography options.  I went with all the same options as before.  You can lower the strength if resources are at a premium.


 Here we'll name the CA.  Again, this is not the same as the server's hostname.  The defaults are fine.


Here we'll specify that we want to get a certificate from our root CA.  Click the radio button next to Send a certificate request to a parent CA, and then hit the Select button and choose the root CA.


Here's where the data files will live for the CA. The defaults are fine for a lab server.


Confirmation of your settings.


 Finish up the wizard and allow the configuration to take place.


Now, create a file share somewhere on the issue CA.  You'll be copying your cert to this share from the root CA later.  If you need a refresh on creating a share, Technet has you covered.

Finally when it is done configuring, you're ready to bring the issuing CA online.  Go back to the root CA and load the Certification Authority mmc.  In the Pending Requests folder, you'll see the request from the issuing CA.  Right click on this request and select issue.


Now you'll see that the cert has moved from Pending Requests to Issued Certificates.


Right click on it again and export the cert.  Once you have it on the HDD, move it to the file share on the issuing CA. For some reason on mine, it saved with a long random name with .tmp as the extension, but it worked.


Back at the issuing CA, right click on the server name and select All tasks, Import.  If you got a .tmp file as well, you'll have to change file type to All Files in the open dialog box.

You'll notice that there really isn't much difference in the layout and functionality of the CA mmc on the two different operating systems.  When you really dig in, there will be additional features in 2012R2, but other than that it's minimal and cosmetic.


With the certificate installed, you'll finally be able to start up the Certification Authority service.  From the CA mmc, right click on the server and select All tasks, start service.


Now that your issuing CA is up and running, wait through another group policy update cycle (roughly 90 minutes) and then you can shut down your root CA.  

Note that the issuing CA will not appear in the Certification Authorities container in Active directory as the root CA did.  Instead, check the Enrollment Services Container, which contains all CAs for Active Directory, not just the root CA.  For the purpose of this post, verification of the issuing CA is enough, but if you care to know more about the matter, you can find some great information on Technet.  I'll certainly cover more in depth information like this as my work in the lab gets to it.


The last step here is to install and configure the NDES service on the issuing CA, but this post is long enough so I'll save that for another post. 

Share:

Saturday, March 19, 2016

Building the Root CA

 on  with No comments 
In , , ,  
In the lab, a single Windows Server running Active Directory and Active Directory Certificate Services.  But if you haven't figured out yet, I am a big fan of overkill and never do anything only to the level of minimum required.  I always like to do everything bigger and better, as there will be additional opportunities to learn that way.  I'm using The 70-640 Self-Paced Training Kit as a guide, one of the two books that I used years ago when I was studying for the MCSA 2008.  I actually liked the Pearson book by Don Poulton better, but the Microsoft Press book is sufficient, even if it is a bit thin in the details.

In a previous post, I created a domain with the name firewallninja.info on a server with Windows Server 2016 Technical Preview 4.  Today we'll continue building out the security lab by adding the first of a 2 tier CA hierarchy, the root CA.  I have previously built a VM with Server 2008R2, configured its hostname and IPv4 settings, and added it to the firewallninja.info domain.  If you need a refresher on adding a new server to your domain, here is a guide for Server 2003 and 2008 and here is a guide for Server 2012R2.  For the root CA, Windows Server 2008R2 Standard, Enterprise or Datacenter Edition can be used.

I selected to go with Server 2008R2 rather than going 2012R2 for both CAs for a couple of reasons.   First, when I had an MSDN account though school years back, I build a large volume of Server 2008R2 VMs and haven't used even a fraction of them yet.  And I probably won't, seeing as most of the labbing I do is on Server 2012R2 at this point.  This is a root CA that is going to be powered down and I'll probably never see it again, so why not.  Second, there are a few slight differences when working with 2008R2 and 2012R2, so I wanted to run through it on both for the sake of exposure.  Server 2008R2 is still out there, probably still in higher numbers than 2012R2 at this point.  I don't recall the root CA requiring any specific version of Windows Server to use the latest/greatest features on the issuing CA, so Server 2000 or 2003, or even Linux with OpenSSL may be sufficient as well.

So let's get started on the root CA.  Log into the server with an administrator account.  A local admin account is sufficient, but you can use a domain admin account as well.  Let the Server Manager load as that's the tool we'll be using.


On the left pane of Server Manager, find Roles and click on it.  On my server, nothing has been installed yet, so the box is blank and says 0 of 17.   Click on Add roles on the right.


Next, select Active Directory Certificate Services.  If you want to add any other server roles, you can select them as well.


Once you have selected Active Directory Certificate Services, you'll see the box change to include options for the role, or roles, that you have selected.


For this server, I'm only going to install Certificate Authority.  The others will be used on the issuing CA later.


Next, I'm going to select Standalone.  The difference is beyond the scope of this post, but you can read more about this at Technet, if you're interested.


Here I'm going to select Root CA.


Next, I'm going to have the server create a new private key.  Since this is a new setup, I don't have an existing key to give it.  If you were replacing a server that died and are fortunate enough to have the private key from that server, you can import it here.  Another reason why you would import a certificate here would be if you purchased one from a 3rd party CA such as GoDaddy.


I'm going to keep the default 2048 bit key, and I'm going to use SHA256.  Modern web browsers are either flat out dropping support for SHA1, or making it difficult to enable, so you should be thinking about that when configuring cryptography in your CAs.  The last option on the page, "Allow administrator interaction when the private key is accessed by the CA" is an additional security control that requires an admin user to interact with the CA.


Next, we'll choose the distinguished name for this CA.  This is not the same as the server's hostname, but can be.


I'm changing the lifetime of the certificate to 20 years.  This is a lab, and I don't want to have to worry about my cert expiring and then finding that the root CA that's been offline for 5 years doesn't want to boot up.  With any luck, I won't still be using this domain in 20 years.


Give the location on the filesystem for the CA data.  Like the AD data, the defaults are fine in the lab, but you'll want to spread the love around multiple spindles if possible in production.


Review your choices here, or don't, and then click Install.


Go grab a cup of coffee and/or a snack. This takes a few minutes, especially in a VM.


Finally, everything is installed and we're ready to go.


Back at the Server Manager, you can view the results of the installation.  For instance, in the events, you should see event 103 which indicates that your CA name has been added to the Certificate Authorities container in Active Directory.

After the next group policy cycle, you can move on to the issuing CA.  Now if we go back to the domain controller and dig down in ADSIEdit, we can see the root CA in the Active Directory schema.  The root CA can go offline once the issuing CA has its cert.


With the root server in AD and powered down, we will only ever need it again at such time that we need to generate a new root certificate.  Next up, the issuing CA.
Share:

Wednesday, March 16, 2016

Shortening ACLs

 on  with No comments 
In ,  
There are two main ways of shortening ACLs and improving their readability or performance. As you know, ACLs can grow to include hundreds of ACEs and cover many pages when printed.  So any way of minimizing the number of ACEs present may be welcomed.   A shorter ACL will consume less flash memory in the form of the startup configuration, less RAM in the form of the running configuration, and less CPU utilization when a packet is eligible to be analyzed by the ACL.

The first method of shortening an ACL is by using CIDR to combine multiple ACEs into a single statement. This method is useful when combining multiple ACEs specifying networks. For example, if you have two statements in an ACL which allow 10.0.0.0/8 and 11.0.0.0/8 as such:

     access-list 1 permit 10.0.0.0 0.255.255.255
     access-list 1 permit 11.0.0.0 0.255.255.255


These two statements can be combined into the single statement 10.0.0.0/7 as such:

     access-list 1 permit 10.0.0.0 1.255.255.255

Anyone who has worked with routers and routing protocols will recognize this method as summarization.  In a properly designed network, multiple networks can be combined, or summarized, into a smaller number of networks for use in ACLs and other purposes such as routing protocols/routing tables. You ultimately strive to be able to summarize down to one network wherever you can.
The second method of reducing the size of ACLs falls into the category of what I would call stupid router tricks. It is accomplished by utilizing binary math to combine two statements into one. This method is useful when combining ACEs that specify individual hosts.  To use this method, first convert the two host addresses into binary.   Second, do a bitwise AND of these two binary numbers. The result of this AND operation will be used and the address of the combined ACE. Next, do a bitwise XOR of the original two binary numbers. This output of this operation will be used as the wildcard mask of the new combined ACE. For example, if an ACL contained the following statements:

     access-list 10 deny host 10.20.30.40
     access-list 10 deny host 40.30.20.10


The result of this operation would yield

     access-list 10 deny 8.20.20.8 34.0.10.34

While this operation results in ACLs whose meaning is not clear, reducing the number of deny or permit statements in half definitely helps in a routers memory, flash, and CPU utilization. 

Would you be interested in a long ACL with dozens of cryptic statements such as the above?
Share:

Tuesday, March 8, 2016

Would Anyone Like to Take a Survey?

 on  with No comments 
In , ,  
I'm looking for a little help for a research project. There are three sections to the survey, and I need answers for all three. You shouldn't spend even 5 minutes. I'll share the results of the study once the data has been analyzed

This study investigates the relationship between emotional intelligence and computer anxiety. In addition, this the study will further explore the extent that age moderates this relationship.

https://www.surveymonkey.com/r/VNDRXQF
Share: