In this post, we'll go through the installation of NDES on the issuing CA. There won't be many screenshots this time around since we've already seen pretty much everything installing the Active Directory Certificate Services role on both CAs. Note that I'll be using the domain name of firewallninja.info throughout. Substitute the name of your domain as appropriate.
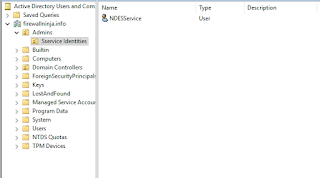
First, we need to add a service account. On the domain controller, launch Active Directory Users and Computers (ADUC) from the Administrative Tools program group. On the left side of the screen, you'll see the OU hierarchy for your domain. Right click on firewallnina.info and create a new OU called Admins. Inside the Admins OU, create another OU called Service Identities. Right Click on Service Identities and select new and then user. Give this user the username of NDESService and a firstname of whatever (you have to give the user either a first name or last name in addition to a username), and on the next screen a password that you'll be able to remember. Uncheck User Must Change Password at Next Login and select Password Never Expires. Finish off the wizard to create the user. It will look as follows when you are done.
Now go back to the issuing CA. Launch Computer Management from the Administrative Tools program group. Expand out Local Users and Groups, and then Groups on the left side. Double Click IIS_IUSRS, and then click Add. In the search box that comes up, enter NDESService, and press OK. Press OK on the IIS_IUSRS properties, And then close Computer Management.
Now in Server Manager, Select Add Roles and Features.
- Hit Next a couple times until you get to the Server Roles screen.
- Expand out Active Directory Certificate Services and check the box next to Network Device Enrollment Service.
- OK additional pieces of IIS to install.
- On the Specify User Account page, click Select User and enter the NDESService user and its password.
- On the Specify Registration Authority Information page, give a name for the NDES service (different than that given for the issuing CA) and select a country from the drop down list. The rest can be left blank.
- On the Configure Cryptography screen, choose the settings that you used for the Root CA and Issuing CA.
- Review the information about IIS and hit next.
- Review the Confirm Installation Services page and hit next.
- Install NDES.
NDES has now been installed on the issuing CA and is ready to use. We've now completed the setup of the issuing CA.


0 comments:
Post a Comment
Discuss this post!